Tuesday, March 5, 2013

New Designs! Now I know my ABCs

With an alphabet twist...

It has been a busy busy start to the year! I wanted to share some new and recent designs that we have added to the collection with an alphabet focus.

Most recently we have added the ABC prints featuring the tranpsortation series in fully customizable colors.

Great for the Nursery:


And even awesomer (yes I did just invent that word) in the playroom:


Lots of different color options too:


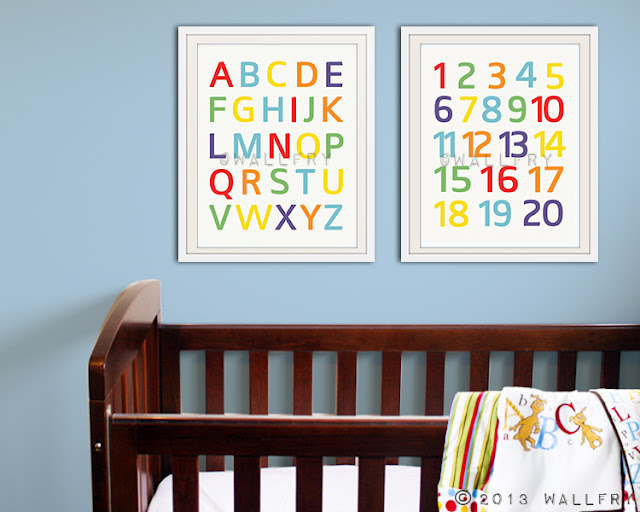
We have had so many requests for a simple, modern alphabet and numbers prints and here they are:


Different color options to choose from too!

Saturday, November 24, 2012

Black Friday / Cyber Monday SALE - 30% off the entire shop


This is our biggest sale of the year!

How is your Black Friday sales shopping going?

Tuesday, November 20, 2012

Mount your pictures on canvas - DIY

My youngest son is growing up (heartbreaking but true) and I am in the process of redecorating his 'big boy' room. I have used this very effective method of displaying wall art and wanted to share this very very simple DIY idea for mounting pictures on canvas:


I love this method of block mounting for a number of reasons:
  1. It is easy - picture, paintbrush, scissors, glue. What could go wrong?
  2. It is cheap - you can usually purchase canvases in a range of sizes at your local craft store for a very reasonable price.
  3. It is easy to hang - canvas is light so you can use removable hooks and blu-tak to hang them. Easy to move too if you don't like where you put it the first time!
  4. It is effective - I love mixing it up on the walls, different colored frames, canvases, block-mountings etc. Something different with a 'Wow!' factor.
It is so easy to do:


What you need:
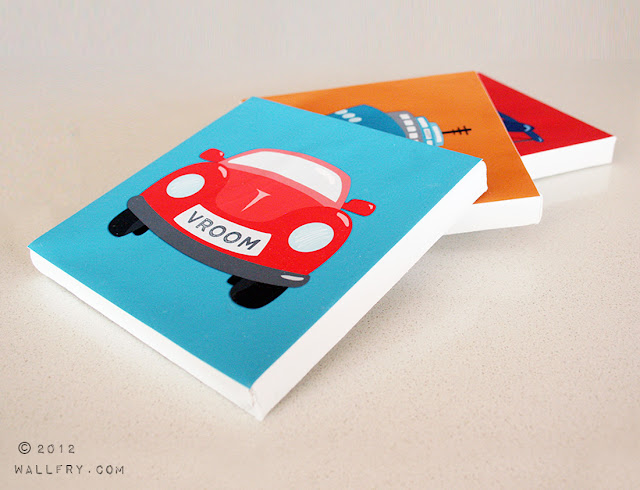
  • Pictures! - paper a little thicker than standard copy-paper works best. If you are a deft hand with Photoshop you could create your own pictures to print out or use some of the many free printable, downloadable, artworks out there (if you don't have your own printer Officeworks or Kinkos or something similar will print a file for you for minimal cost). Your favorite scrapbook paper could work too for a patterened block effect. In this instance I used some of my own designs from my Transportation series.
  • Scissors, ruler, pencil - to cut your picture to size.
  • Canvases - your size of choice.
  • Glue & brush - I use Mod Podge although I am sure you could use something similar just as effectively.
Process:
  • Cut your picture to size.
  • Use a generous amount of glue and paint the face of the canvas
  • Attach the picture to the canvas, smoothing out any airbubbles with a clean, dry cloth, being careful not to get any glue on the front of the picture.
  • I didn't seal the front of the picture, but if you do want to seal it, be careful that your printout is not going to smudge.
 Tips:
  • My paper curled a little when in contact with the glue so I put the whole thing upside down on a clean dry surface until it was dry.
  • Don't stress that it looks buckled or warped at first. Canvas stretches when wet but will reform it's size and shape when dry so it should all flatten out when the glue has dried (as long as you get out the air bubbles and don't crease the picture when smoothing).
I LOVE the end result:
 

 Because these were smaller, lighter canvases, I attached them to the wall with Blu-tak (wall mounting putty like fun-tak) so that I can move them around easily. With any of these wall putty products, be very careful to test on your walls first and super-careful when removing it so as not to remove any chunks of plaster with it!


 While I was in the mood, I also created some fun typography and mounted them on canvas too:


Twinkle Twinkle is always his song of choice for his bedtime song and 'Banana' is his favorite word (don't ask). I have hung these at the foot of his bed for a personal touch. They will be cheap and easy to move or replace as his 'favorites' change over time.

I am planning to do a collage of larger canvases and printouts for my older son's room, so I will keep you posted.

Have fun creating!

Tuesday, November 13, 2012

Superhero Party - DIY 3D City

I can't believe that it is that time of year again! No, I don't mean the holidays, although they are also creeping up, I mean time for organising and planning the kids' birthdays.

This year my eldest son turns 4 and he is determined to have a superhero party. You may or may not be a fan of stereotypical 'themed' parties for kids, but once your nearly 4 year old gets his mind set on something, it is very difficult to shift.

I am still in early planning stages for the party but I thought I would share with you this fabulous DIY project I have begun for the decorations.


This 3D superhero city-scape looks so effective and was the easiest thing to make, seriously anyone could do it.
 
 
Superhero party decoration DIY tips:
  • Save boxes of various sizes over a period of time, the more variation in sizes the better. If you are using the decoration on a table setting then keep your boxes smallish so as not to take up too much space.
  • Color the boxes black or grey. Your options on how to do this are endless, I simply 'wrapped' them in black crepe paper, keeping all the daggy bits at the back and bottom where I know they will be out of sight. You could of course paint them for a bit more durability, but I thought wrapping was a lot quicker.
  • Add windows. I simply cut rough squares and rectangles out of white copy paper (yellow could work too) and glued them on. Don't try and be too perfect, mishapen windows give it more of a 'comic book' feel. Again, I guess you could paint them if you felt so inclined.
  • Have fun arranging!
If you can get hold of some superhero figurines you could scatter them throughout your 'city' or you could cut out pictures of your favourites and prop them up for effect:


My original intention was to use it as decoration on the desert table with various superheros scattered about, but it is currently in the playroom and the kids love playing with it!


Now the only problem is to keep it in one piece to last until the party..... oh well I guess I could always make more!


Wednesday, October 24, 2012

Bull Cake Compromise

A mother is nothing, if not a dealer in compromise.

My son wanted a rainbow bull cake for his 3rd birthday and while I managed to talk him out of it in this post I couldn't disappoint him completely.

This is where compromise kicks in:


This party was my first (and only so far) attempt at cake pops. Although guests said lots of nice things, I pretty much considered it a fail in general which I painfully detail here.

I guess they look 'OK' but I have said it before and will say it again, "I am no Bakerella!". The most important thing though was that the birthday boy loved them, and he did! Although not as much as his Raa Raa cake.

Saturday, May 12, 2012

The Coolest Play Center Ever?

In Australia we have indoor play centers. These play centers are commonly (with exceptions I am sure of, but yet to experience) pretty standard variations on a similar theme; small play area for toddlers with the treacherous ball pit (where you can find all sorts of foreign objects from other kids poo to intravenous needles) and a smattering of half-broken wheeled toys; larger area for the bigger kids consisting of a framed climbing gym with slide.

If you are really lucky there will be signs on each of these areas, one declaring 'FOR CHILDREN UNDER 3 ONLY' and the other insisting 'NOT SUITABLE FOR CHILDREN UNDER 4' leaving you clutching your 3 year old's hand and scratching your head.

This week I went to what I think might be the 'Coolest Play Center Ever':


The Imaginarium Project in Geelong, Victoria might not strictly be a play center, but it sure is a great alternative. It is literally a mini-world of imagination, color and wonder:

Face-painting in the Alice in Wonderland garden

A large warehouse has been sectioned off into a series of themed rooms with the most amazing attention to detail. Someone very talented (and very busy) has painted murals on every wall and there are a range of toys and games for the children to get involved with:

Underwater themed room


Pirate room

There was also a 'down the rabbit hole area, a western room, a glow-in-the-dark room with a haunted house and a room covered in chalkboard paint where you could draw on the walls and the chalk glowed.

Best part is the cafe with hidden coffee nooks throughout the center as well:


The price was good at $5 per head for the kids (adults free) but might get a bit costly for the older ones (4-12 years $12 each). You might also have some reservations around the appropriateness of some of the guns, swords and skulls in the pirate and western rooms but the kids LOVED it.

Maybe not the coolest place 'ever but it was certainly a welcome change to your run of the mill center.

Friday, May 11, 2012

Website Launch - and a SALE

After lots of hard work and dedication the WallFry website has finally launched and it looks pretty cool, if I do say so myself - www.wallfry.com.au :


And of couse, to celebrate, there has to be a sale. Available at the new website only:


The Etsy shop is still open and going strong so now you have multiple choices of where you would can browse for your next WallFry artwork.

Tuesday, May 1, 2012

NEW Prints

We have been sooo busy lately, building and creating the new website (which is very exciting, but also very hard work!).

I have been having a creating streak at the same time though and here are some of the new prints I have added to the shop recently:


 I love this Jane Austen quote from Pride and Prejudice (Mr Darcy to Elizabeth of course) and I love it for nursery decor! Share your love of great books with your little one while telling them you love them at the same time!


This baby deer is the latest addition to the Woodland Series. I am working on more too so will be adding and sharing them once they are done.


There are so many dogs in my dog series, but always more that I haven't added yet. This one was a popular request and here he is! There are even more, all pictured below:


Now, back to working on that website!

Saturday, April 28, 2012

NEW GIVEAWAY - yes another one!

It's giveaway time again, this time hosted by the amazing Maggie at Smashed Peas and Carrots. There is a set of 4 - 8x10 prints of the winners choice up for grabs and you only need to comment to enter.

Good Luck!

Some of the huge range of prints that you can choose from if you are the lucky winner:


Friday, April 20, 2012

Puppy Dog Cake for a 2 year old - Can I keep this up?


Each year I make my two boys a cake. You may remember my post regarding the dilema with my 3-year olds 3rd birthday cake which ended up being a pretty satisfactory lion (albeit a licensed TV character, but that is all part of the story). This time it was nearing my youngest son's 2nd birthday so again the preparations begin:

Me: What type of cake would you like for your birthday?
Nearly 2: A birthday cake
- 1 point him, 0 points me

Me: Ok, then what color would you like it to be?
Nearly 2: Grey
 - I didn't even know he knew that grey was a color

Eventually we got an answer and ultimately he wanted a 'Dog Cake'. This was lovingly supported by his 3 year old brother and seemed easy enough to me so a Dog Cake it would be.


TIP: when let your kids choose their cakes, encourage them to choose something generic like a dog rather than an existing character (Raa Raa anyone?) there is so much more room for error. What starts out as a rottweiler might end up as a beagle and that will still be OK. There are only so many ways you can do a Dora cake before it starts to look like a football or an Elmo cake before it starts to look like a big red mess.

ANOTHER TIP: if you keep making each cake better than last year's cake you will end up with no where to go. At least at the ages of 2 and 3 the expectations are not too high, but I can see that the pressure will continue to mount.


TUTORIAL: I keep getting asked for tutorials or tips. I always plan to take great photos and post them here with a tutorial, but then end up making the cake at midnight the night before the party with no time to do any of that (most of the time I am lucky to get the cake done) so apologies that again, there is no tutorial.

If you have any specific questions though, feel very free to ask and I will answer where I can. If it helps, I got my inspiration (and a lot of my 'tips') for making this cake from this lovely post here: http://www.coolest-birthday-cakes.com/coolest-dog-cake-41.html
Related Posts Plugin for WordPress, Blogger...