Tuesday, June 10, 2014

Superhero Cupcake Stand - DIY

Preparations for the 'Superhero' party for Mister 4 are in full swing and, let's face it, the creative juices are well and truly flowing.  

Enter the superhero cupcake stand:


I purchased a super-cheap plain cardboard cupcake stand (the type you put together yourself), and just painted my superheros of choice. I used some paints that I had around the house to create the perfect stand to match the party theme (and colors).


I know that you can get some 'superhero' themed ones of these ready-made, but the only ones I could find were either super cheesy or super violent. I chose the three superheroes (my sons' two favorites and one to match the color theme) and went to work.

I even included an 'H' instead of the 'S' for 'Super Harvey!'


It was a bit more work than I expected (it took a few coats to get the colors bright enough) but I think it looks pretty cool. I was a bit reluctant to cover it up with my version of 'cupcakes' (chocolate crackles).


More of the Superhero Party posts, tips and tutorials HERE


Wednesday, June 4, 2014

More colorful characters...

Is your dog a colorful character? We love dogs and we love colors. Wallfry's colorful dog competition is nearly over - we'll draw the winner on June 15. In the meantime, here are some of the awesome entries so far...
If you would like to enter, tag a photo of your flashy furry friend on Instagram with #wallfrycomp and you will go in the draw to win a Wallfry dog print of your choice.
Here are some entries below...
Get Adobe Flash player
Photo Gallery by QuickGallery.com

Tuesday, June 3, 2014

Spiderman Cake!

A Superhero cake for my 4 year old Superhero.


I always promise to take photos and post a step by step of my next cake, but I always run out of time.

Here is a snapshot summary of this one:

  • Base rectangular cake - white chocolate mud cake cooked in a rectangular tray.
  • Spider man head cake - vanilla butter cake cooked in a soccer ball tray cut and pasted back together to make an oval shape 
  • *I added blue and red color to the head of this cake before baking to go with the theme. Unfortunately it came out a browny purple red and blue swirly mess. We called it 'Spiderman brains' and the kids LOVED it - save!
  • Fondant icing - marshmallow fondant (first time I made my own and found it a bit grainy and difficult to work with, but delicious, might try a different recipe next time)
  • Colors - Americolor gels (make sure you use proper gel colors, the watery ones you get at the supermarket will not get bright deep colors like these)
  • Webbing - Royal icing (dyed black). I practiced a heap on baking paper before piping on the actual cake, no going back on that one
  • Buildings, eyes etc - Colored, rolled fondant. I find this much easier than gum paste when working with flat shapes (moulded shapes are a different matter)


Most of my inspiration came from a lovely blog called Amanda's Cookin' and she has some great pics (including details of how to cut the head).

Some more superhero party goodness HERE. Will be adding more of the super hero party fun and creativity over the coming weeks.


Tuesday, May 27, 2014

Cooking With Kids - Damper

I think by now we all know that kids love cooking. They love learning how things are made and being part of the process of creating something that they can eat. It gives them a great sense of satisfaction and achievement and can even sway a fussy eater into trying something new if they have 'cooked' it themselves.

I am always looking for ways to get the kids involved in the kitchen like Sunday night 'build your own pizzas'. When it comes to the kitchen though, what my kids like most is getting their hands dirty. That usually means cakes and cookies and while that is OK on occasions I am always looking for alternatives that are both fun and (at least moderately) healthy.


Enter damper. If you are Australian you know damper as bush tucker, a quintessential part of your childhood. Pulled over a stick and roasted over an open fire or backed in the coals of a camp fire there was no better way to spend a cold, wet winters day... ahh good memories...

For those who have no idea what I am talking about damper is basically bread without yeast.


The base ingedients for damper are flour, salt, butter and milk / water (maybe a bit of baking soda) and then you can add pretty much any ingredients you and the kids fancy. We added sultanas and blueberries but the options are almost endless (cheese, herbs etc). There are plenty of recipe variations online, we used this one for our base.

The kids loved getting stuck into it and choosing the ingredients that we added.


While roasting in the coals of a campfire is nice and all it can just as easily be baked in an oven.

We just ate ours with some butter, but next time we might have to try some golden syrup.


Fun, educational and a lovely rustic snack on a cold winter's day (or any day to be honest).

Tuesday, May 20, 2014

Aussie Animals On Their Way!

I am sooooo excited about this!

A little known fact (not really but it sounds dramatic) is that we welcomed our adorable baby girl into our family of four last year. Now, I will confess that I don't do pregnant well at all (I will spare you the graphic details) and coupled with the (although completely gorgeous) considerably demanding new baby on the scene pretty much wiped out any opportunity to get creative. Although WallFry has been open for business this whole time, I haven't really been able to create something NEW (other than the new baby of course).

Which is why I am so excited about this work in progress:


This is a wombat.
This wombat is one of the new Australian animal designs I am working on to add to the WallFry range.

Another little known fact (again not really) is that we are Australian and for years now I have been wanting to add an "Australian Animal" series of prints to the range. So I have been drawing, drawing, drawing and the creative juices are well and truly flowing and I am just loving designing these gorgeous little guys.

The hardest part is choosing which animals to include, here are some up for consideration...


Can't wait to share the final products here when they are done!

Monday, May 19, 2014

Colorful dogs competition - Win a Wallfry Dog Print!

Is your dog a colorful character? We love dogs and we love colors. We’re on the lookout for the most colorful canine character – and we’d love you to be involved. Tag a photo of your flashy furry friend on Instagram with #wallfrycomp and you will go in the draw to win a Wallfry dog print of your choice.
Here are some entries below...

Get Adobe Flash player
Photo Gallery by QuickGallery.com

Tuesday, March 5, 2013

New Designs! Now I know my ABCs

With an alphabet twist...

It has been a busy busy start to the year! I wanted to share some new and recent designs that we have added to the collection with an alphabet focus.

Most recently we have added the ABC prints featuring the tranpsortation series in fully customizable colors.

Great for the Nursery:


And even awesomer (yes I did just invent that word) in the playroom:


Lots of different color options too:


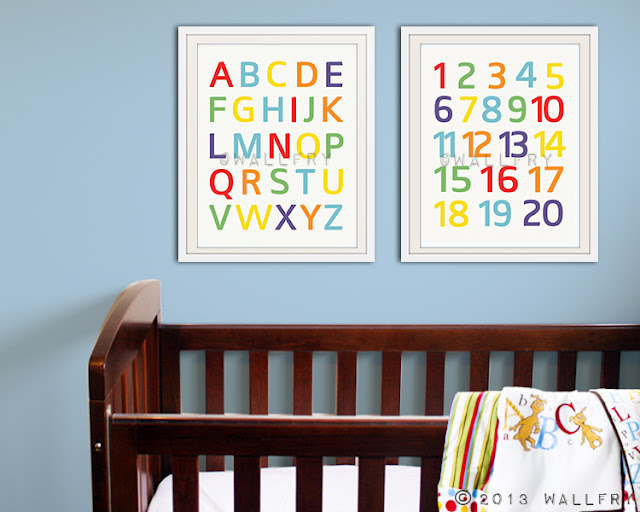
We have had so many requests for a simple, modern alphabet and numbers prints and here they are:


Different color options to choose from too!

Saturday, November 24, 2012

Black Friday / Cyber Monday SALE - 30% off the entire shop


This is our biggest sale of the year!

How is your Black Friday sales shopping going?

Tuesday, November 20, 2012

Mount your pictures on canvas - DIY

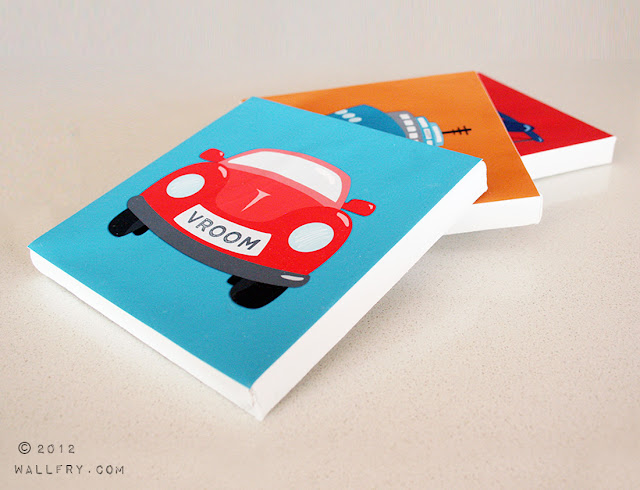
My youngest son is growing up (heartbreaking but true) and I am in the process of redecorating his 'big boy' room. I have used this very effective method of displaying wall art and wanted to share this very very simple DIY idea for mounting pictures on canvas:


I love this method of block mounting for a number of reasons:
  1. It is easy - picture, paintbrush, scissors, glue. What could go wrong?
  2. It is cheap - you can usually purchase canvases in a range of sizes at your local craft store for a very reasonable price.
  3. It is easy to hang - canvas is light so you can use removable hooks and blu-tak to hang them. Easy to move too if you don't like where you put it the first time!
  4. It is effective - I love mixing it up on the walls, different colored frames, canvases, block-mountings etc. Something different with a 'Wow!' factor.
It is so easy to do:


What you need:
  • Pictures! - paper a little thicker than standard copy-paper works best. If you are a deft hand with Photoshop you could create your own pictures to print out or use some of the many free printable, downloadable, artworks out there (if you don't have your own printer Officeworks or Kinkos or something similar will print a file for you for minimal cost). Your favorite scrapbook paper could work too for a patterened block effect. In this instance I used some of my own designs from my Transportation series.
  • Scissors, ruler, pencil - to cut your picture to size.
  • Canvases - your size of choice.
  • Glue & brush - I use Mod Podge although I am sure you could use something similar just as effectively.
Process:
  • Cut your picture to size.
  • Use a generous amount of glue and paint the face of the canvas
  • Attach the picture to the canvas, smoothing out any airbubbles with a clean, dry cloth, being careful not to get any glue on the front of the picture.
  • I didn't seal the front of the picture, but if you do want to seal it, be careful that your printout is not going to smudge.
 Tips:
  • My paper curled a little when in contact with the glue so I put the whole thing upside down on a clean dry surface until it was dry.
  • Don't stress that it looks buckled or warped at first. Canvas stretches when wet but will reform it's size and shape when dry so it should all flatten out when the glue has dried (as long as you get out the air bubbles and don't crease the picture when smoothing).
I LOVE the end result:
 

 Because these were smaller, lighter canvases, I attached them to the wall with Blu-tak (wall mounting putty like fun-tak) so that I can move them around easily. With any of these wall putty products, be very careful to test on your walls first and super-careful when removing it so as not to remove any chunks of plaster with it!


 While I was in the mood, I also created some fun typography and mounted them on canvas too:


Twinkle Twinkle is always his song of choice for his bedtime song and 'Banana' is his favorite word (don't ask). I have hung these at the foot of his bed for a personal touch. They will be cheap and easy to move or replace as his 'favorites' change over time.

I am planning to do a collage of larger canvases and printouts for my older son's room, so I will keep you posted.

Have fun creating!

Tuesday, November 13, 2012

Superhero Party - DIY 3D City

I can't believe that it is that time of year again! No, I don't mean the holidays, although they are also creeping up, I mean time for organising and planning the kids' birthdays.

This year my eldest son turns 4 and he is determined to have a superhero party. You may or may not be a fan of stereotypical 'themed' parties for kids, but once your nearly 4 year old gets his mind set on something, it is very difficult to shift.

I am still in early planning stages for the party but I thought I would share with you this fabulous DIY project I have begun for the decorations.


This 3D superhero city-scape looks so effective and was the easiest thing to make, seriously anyone could do it.
 
 
Superhero party decoration DIY tips:
  • Save boxes of various sizes over a period of time, the more variation in sizes the better. If you are using the decoration on a table setting then keep your boxes smallish so as not to take up too much space.
  • Color the boxes black or grey. Your options on how to do this are endless, I simply 'wrapped' them in black crepe paper, keeping all the daggy bits at the back and bottom where I know they will be out of sight. You could of course paint them for a bit more durability, but I thought wrapping was a lot quicker.
  • Add windows. I simply cut rough squares and rectangles out of white copy paper (yellow could work too) and glued them on. Don't try and be too perfect, mishapen windows give it more of a 'comic book' feel. Again, I guess you could paint them if you felt so inclined.
  • Have fun arranging!
If you can get hold of some superhero figurines you could scatter them throughout your 'city' or you could cut out pictures of your favourites and prop them up for effect:


My original intention was to use it as decoration on the desert table with various superheros scattered about, but it is currently in the playroom and the kids love playing with it!


Now the only problem is to keep it in one piece to last until the party..... oh well I guess I could always make more!
 
 
Related Posts Plugin for WordPress, Blogger...